


Extend Your Auth0 Authentication Flow Through Auth0 Actions
When using a third-party service such as Auth0 to handle all the authentication needs of your application, you might need to hook some custom functionality into the authentication process. An example might be the requirement of an application to send a security email to users after they change their password.
In this tutorial, you will learn about Auth0 Actions, and how they can be used to hook custom processes to your existing authentication flow.
What We Will Build
Within this article, you will build an Auth0 Action written in Node.js to implement the delivery of email alerts to users within your Auth0 tenant in response to a password change event that is triggered after a user changes the password to their account.
Prerequisites
This tutorial contains a demo implementation of an Auth0 Action to send email alerts. To follow along with the steps to build the Action, you need:
- An auth0 account . If you do not have an account, you can sign up for a free account.
- A Mailgun account to use as an SMTP server to send emails through the Auth0 Action.
Auth0 Actions
An Auth0 Action is a serverless function contained within an Auth0 tenant and written in JavaScript using the CommonJS module syntax. Different registered triggers execute AuthO Actions during an authentication flow. An example is the Post Change Password flow triggered when a user changes their password.
With new features such as version history, and a Drag ‘n’ drop flow editor, Auth0 actions aim to improve the developer experience obtained while building and extending your Auth0 application through the Auth0 dashboard.
The Action Marketplace contains Actions built to integrate a third-party service into an Authentication flow. You can use these existing Actions by providing the required connection details to connect your Auth0 tenant to the third-party service.
In situations where you cannot find a prebuilt Action that suits your authentication requirements, you also have the option to build a custom Action through the Auth0 dashboard.
Build A Custom Auth0 Action
With the knowledge learned on Auth0 Actions, let us proceed to use the build a custom Auth0 Action that is executed whenever a user changes their password. After its execution, an email will be sent to the account owner, to inform them that their password has been changed as a custom security feature.
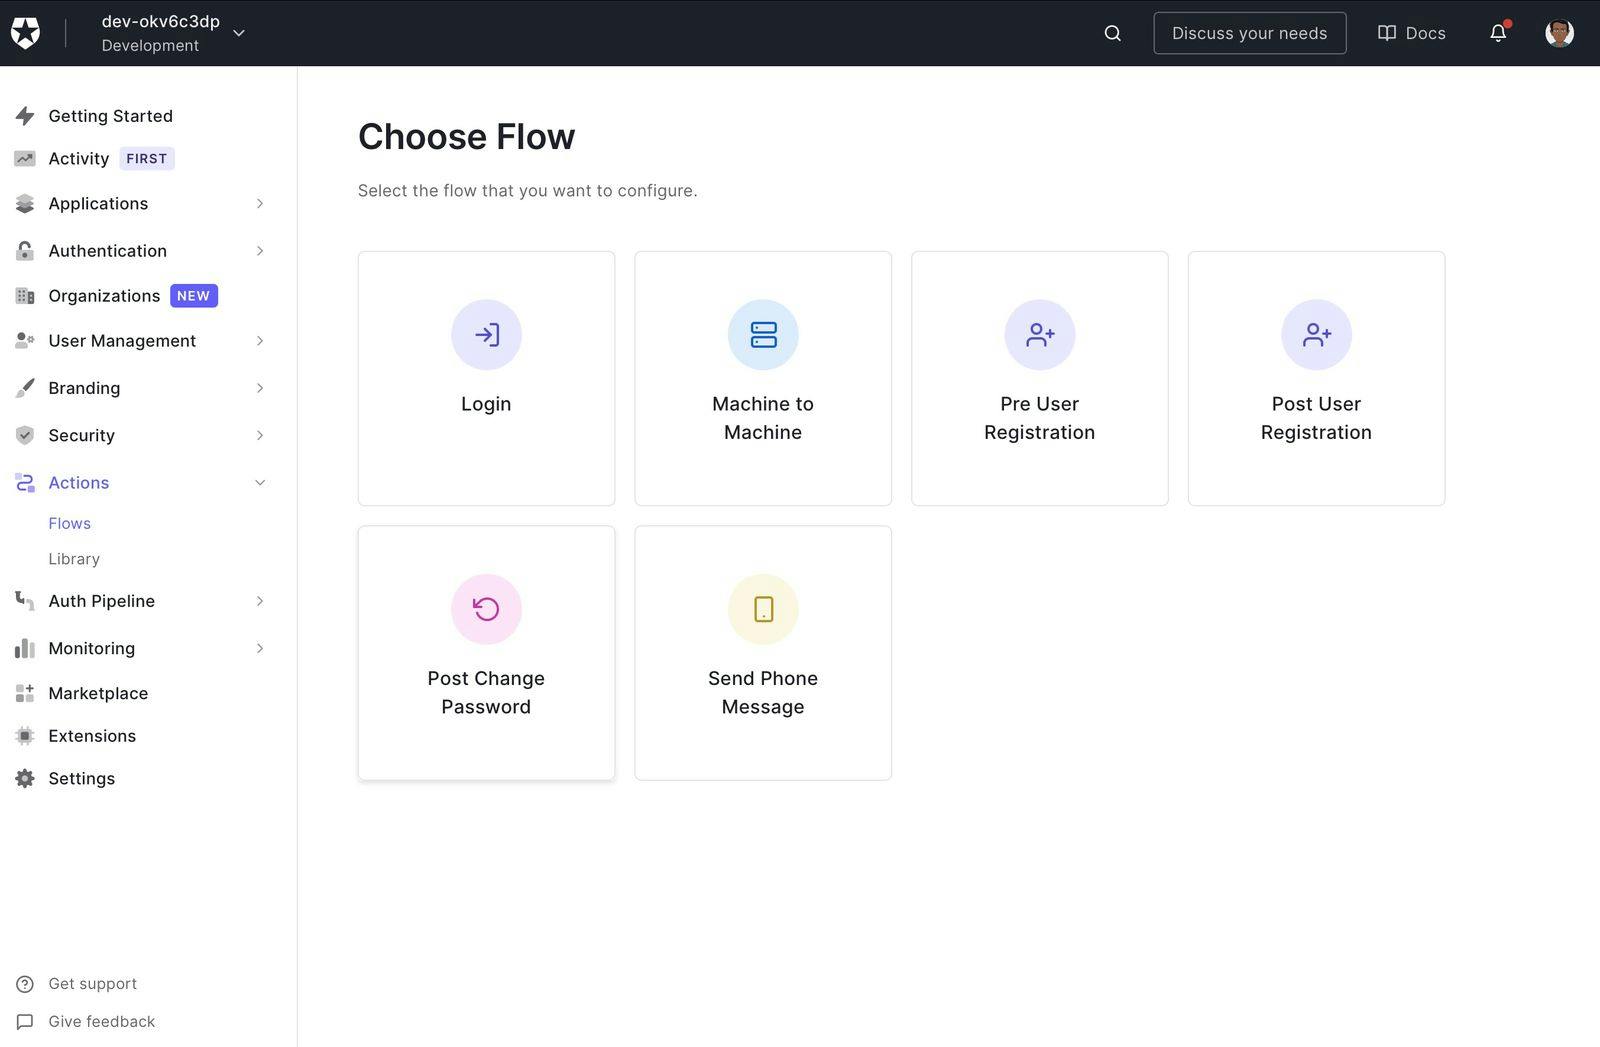
From the left sidebar of your Auth0 dashboard, click the Actions item to expand the dropdown, and click the Flows item to navigate to the next page where you select the flow type you want to build.
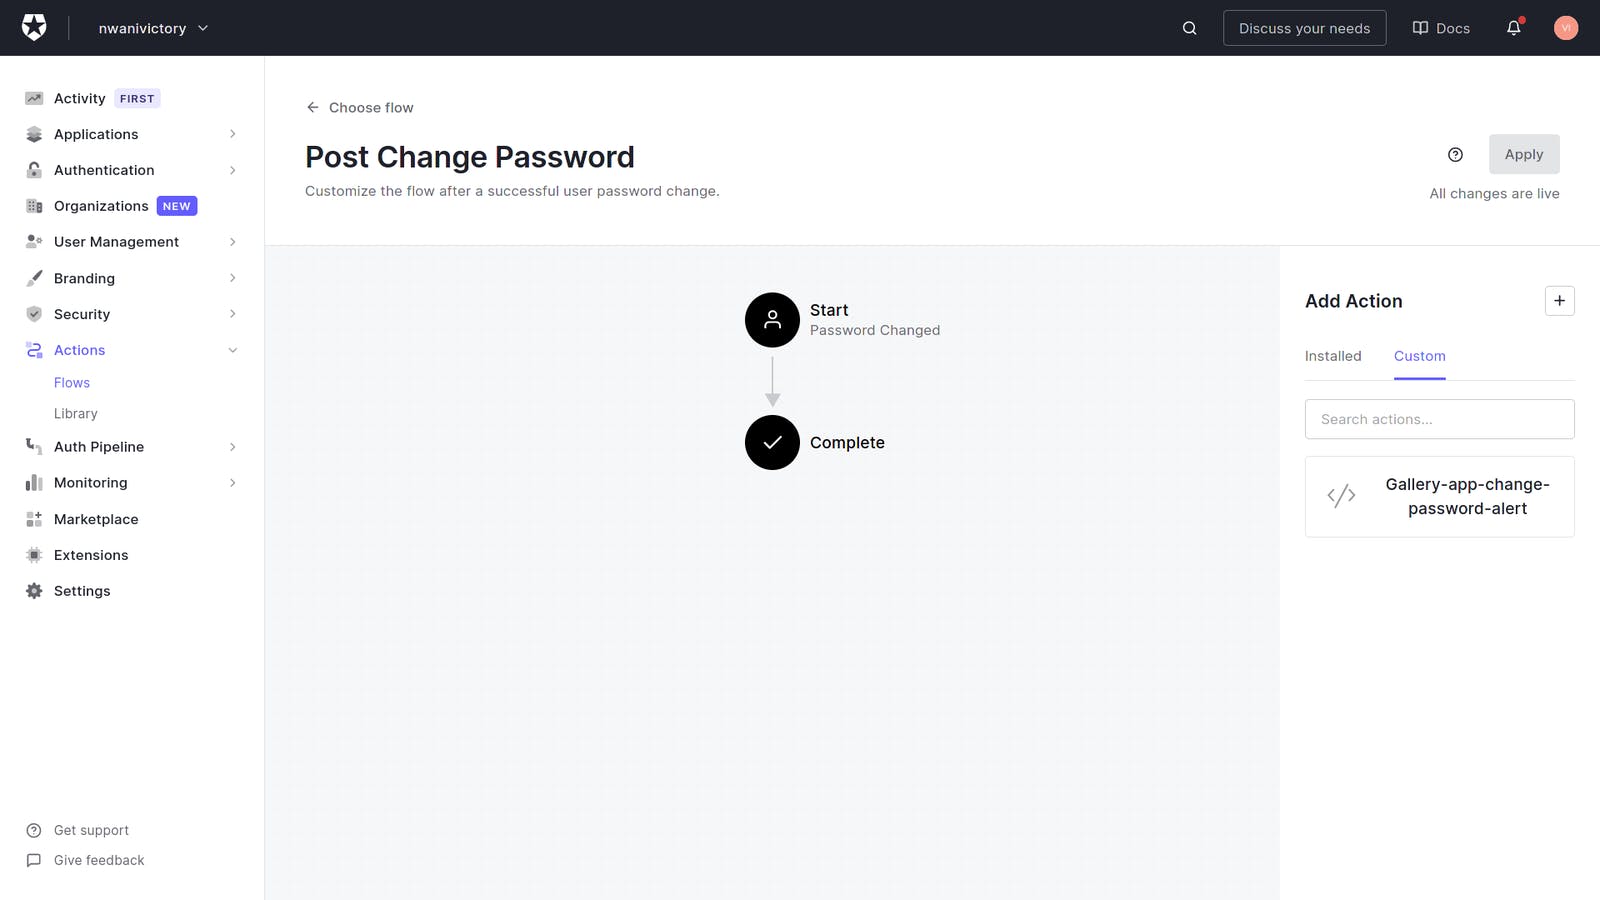
From the flow type page, click the Post Change Password item to navigate to the flow editor where you will select an existing Auth0 action for this flow, or build a new Auth0 Action. This flow will trigger your Auth0 Action after a user changes their password.
From the right Add Action sidebar on the next page, click Custom tab, and click on Create Action to create your Auth0 Action for this application.
The Create Action text will open a modal for inputting the details of the new Action.

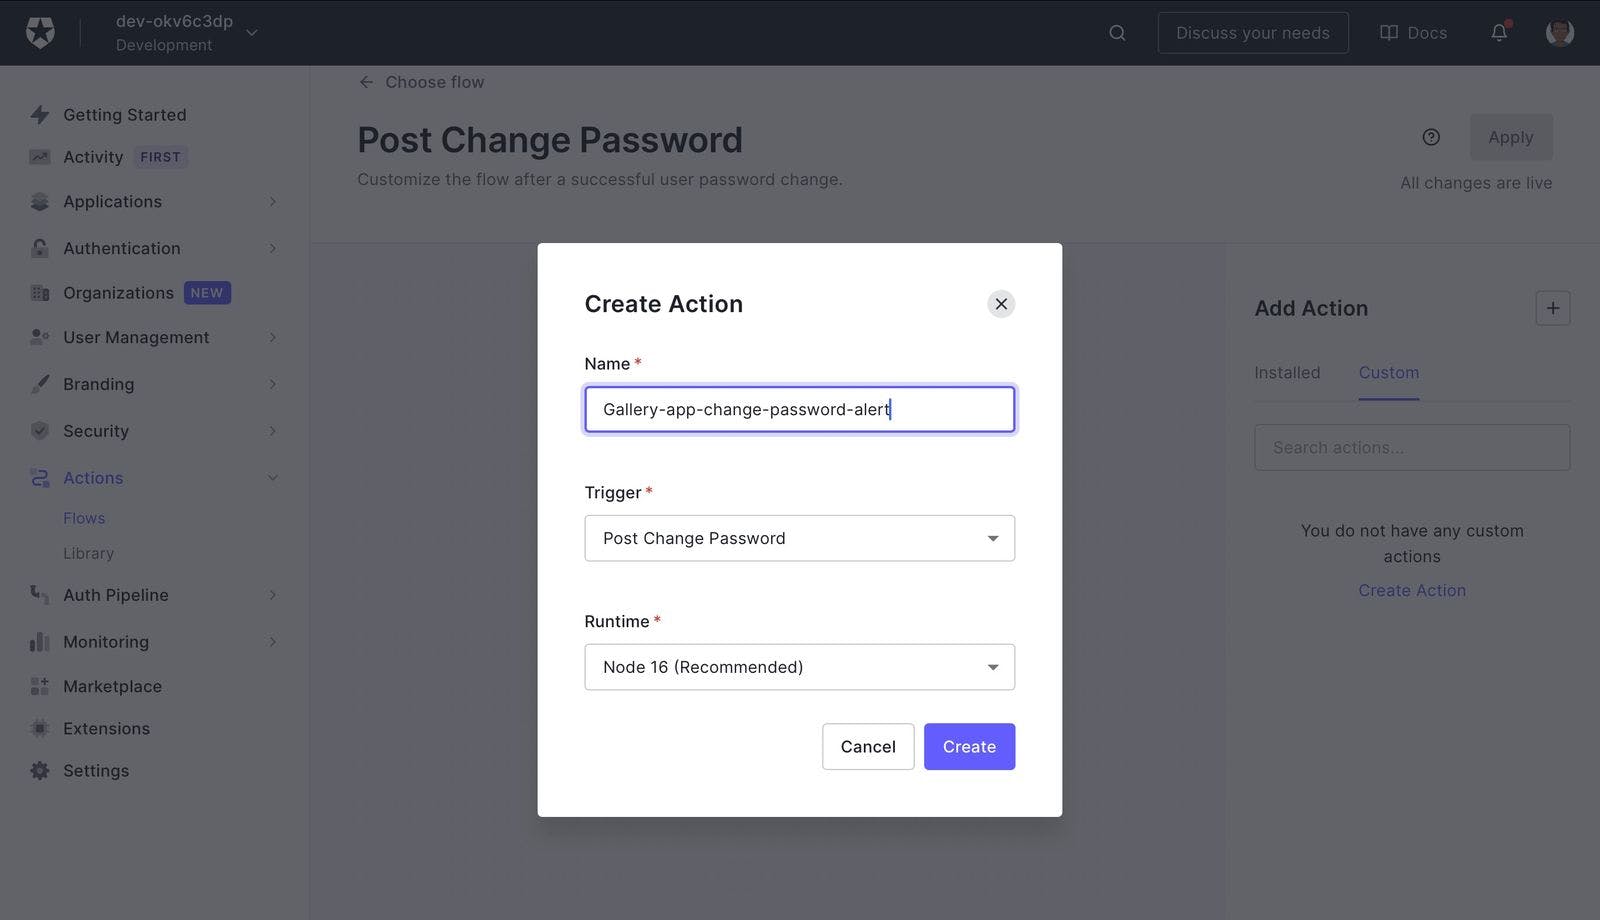
From the opened Create Action modal, enter a preferred name for the Action in the Name input field.
By default, the recommended Node 16 runtime will be selected. However, you can change this runtime to Node 12 if you will use a library that does not support the Node 16 runtime.
Click the Create button to create the Action and proceed to the code playground where you will write the JavaScript code to be executed when this Action is triggered.
The Actions playground on the next page provides a code editor for you to write the JavaScript function executed when this action is triggered.
From the Actions playground, you can test and debug your Action before clicking the Deploy button to deploy it into your flow. You can also use the Version History to view all deployed versions of an Action.
Action Environment Variables
Sensitive credentials used with an Action are stored as secrets and the values are accessed using the keys field within the event parameter. Even though your Action code might be available to you only, it is recommended that you store all sensitive credentials as secrets.
Note: Please go through the Where Can I Find My API Key and SMTP Credentials? question within the Mailgun Help Centre to know where to retrieve your Mailgun SMTP credentials.
To add the three SMTP credentials that will be used by the nodemailer node package to send email alerts, click the lock icon within the code editor’s sidebar.
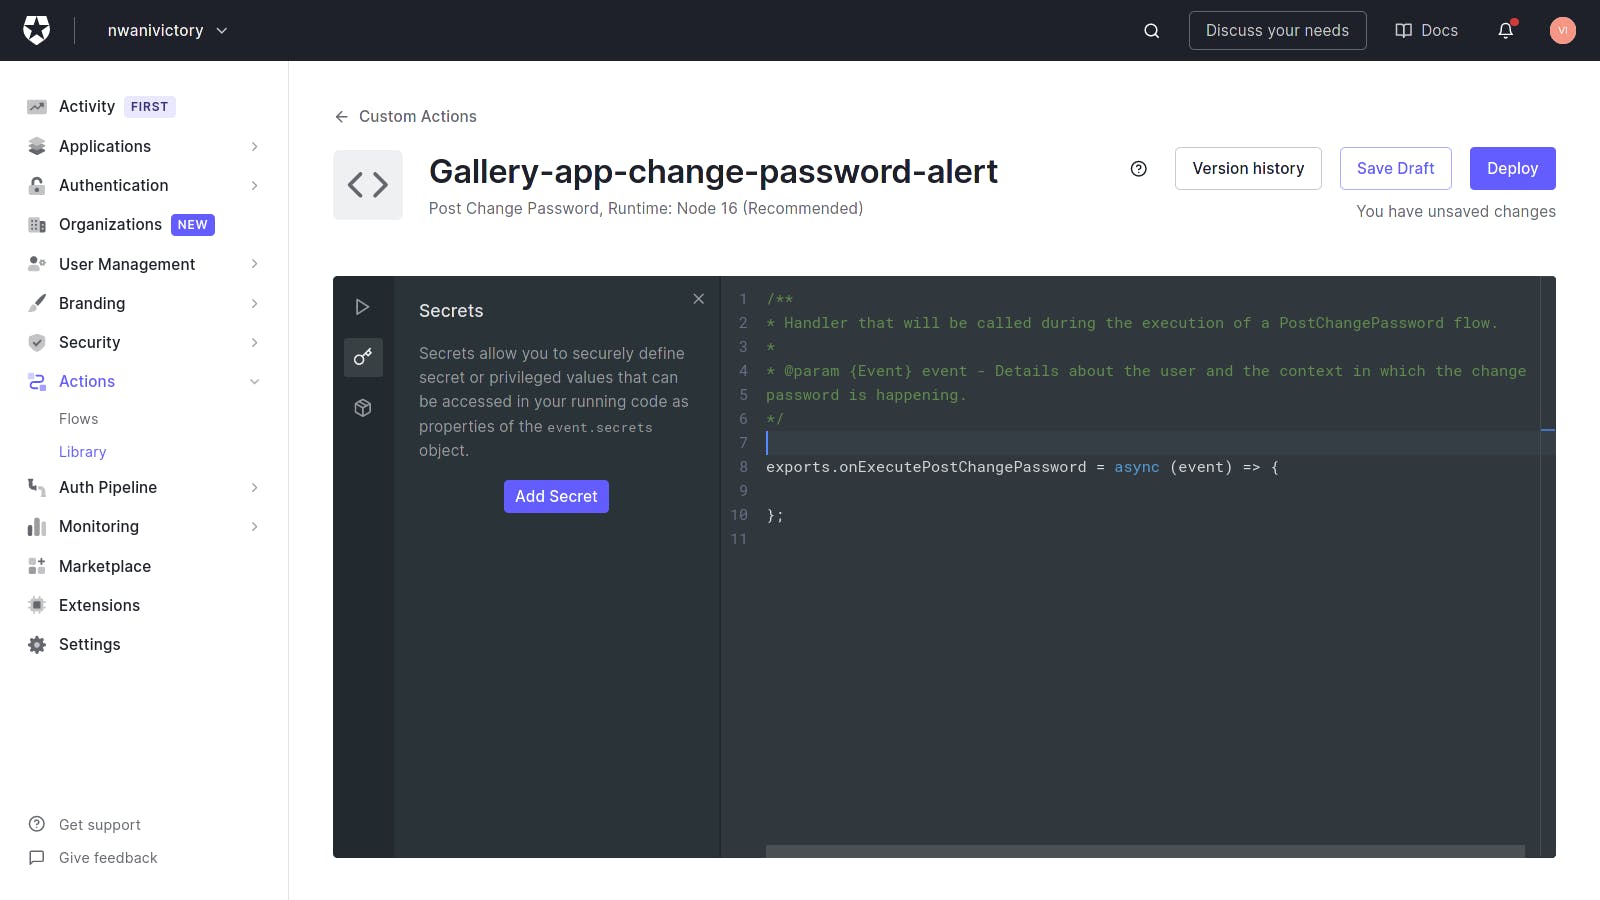
Click the Add Secret button within the Secrets section to launch a modal for inputting the key of a secret and its value.
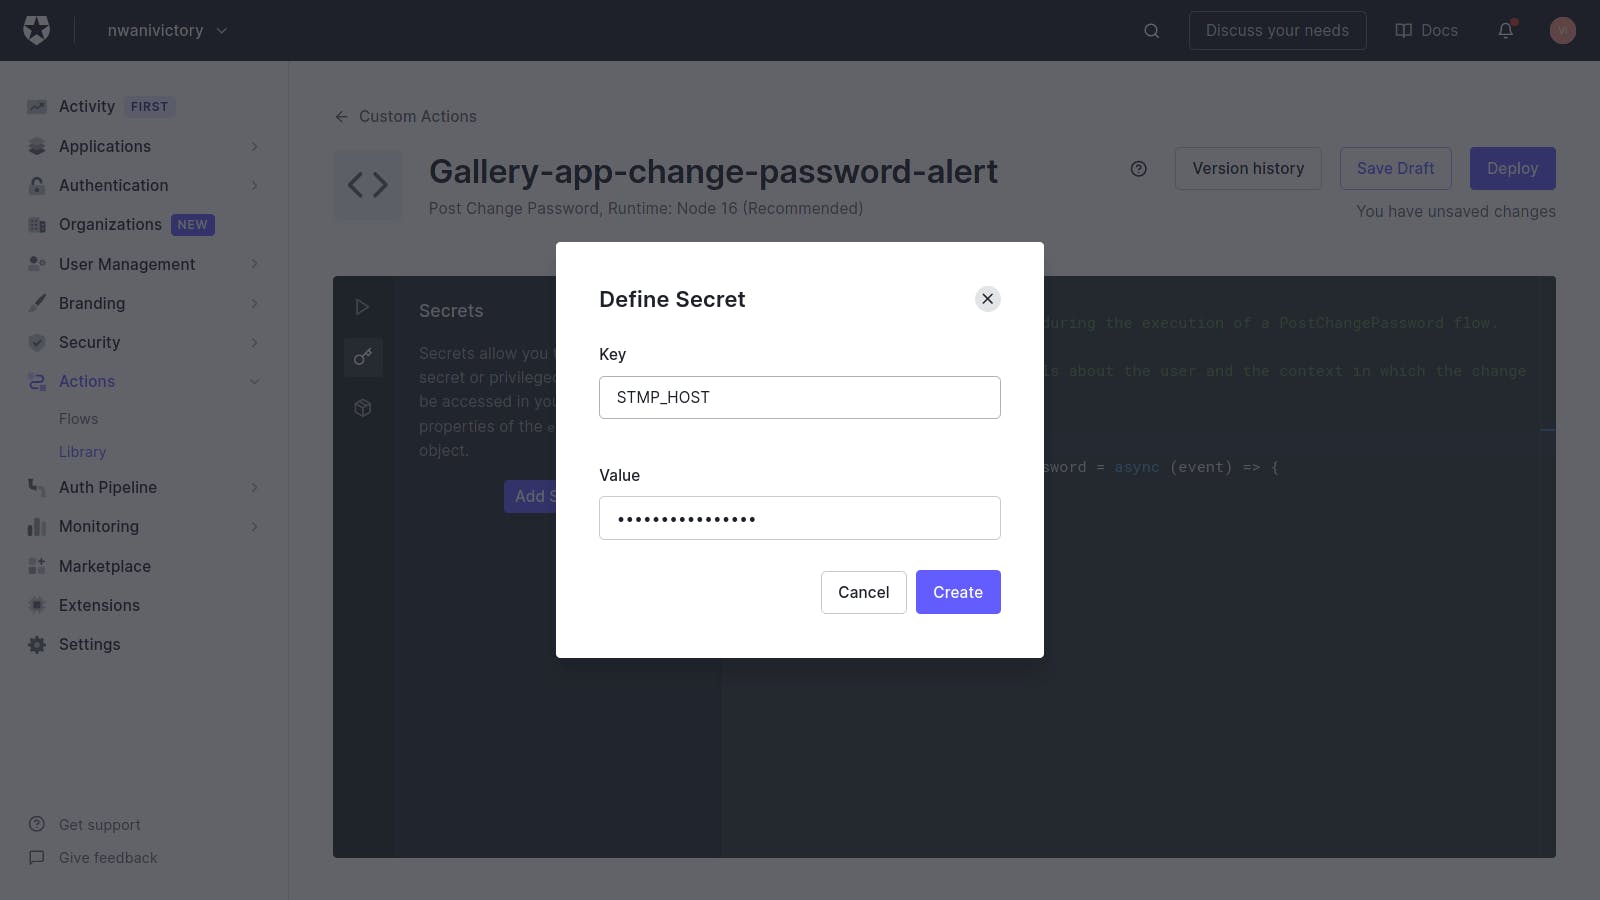
Repeat the process to create secrets for the SMTP_HOST, SMTP_PASSWORD, and SMTP_USERNAME credentials that will be accessed within the code for the email alert function.
Implement Email Alert Function
With the credentials for the Action stored using secrets, let us proceed to implement the JavaScript function for sending an email using the Nodemailer package.
When the Action is tested for the first time through the Action simulator, a mock email addressed will be passed into the event object. There is no way to view the email that will be sent to the mock email address, hence the need for using your email address in the EMAIL_ADDRESS placeholder.
Replace the EMAIL_ADDRESS placeholder in angle brackets with your email address, and add the entire content of the code block below into the Action code editor:
const moment = require("moment");
const nodemailer = require("nodemailer");

exports.onExecutePostLogin = async (event, api) => {
const { user, request, secrets } = event

const customEmail = “<EMAIL_ADDRESS>”
const { nickname, email } = user
const { SMTP_HOST, SMTP_USERNAME, SMTP_PASSWORD, SMTP_SENDER } = secrets

const transport = nodemailer.createTransport({
host: SMTP_HOST,
port: 587,
secure: false,
auth: { user: SMTP_USERNAME, pass: SMTP_PASSWORD },
});

try {
await transport.sendMail({
from: SMTP_SENDER,
to: customEmail,
subject: "Gallery App Password Change Alert",
text: `Password change alert!`,
html:
`
<div>
<h4> Hello ${nickname},</h4> <br />
<p>
Your password was changed today at
<b> ${moment(new Date()).format("hh:mm A")}</b>
from a device in ${request.geoip.cityName}, ${request.geoip.countryName}
</p>
</div>
`,
});

console.log(“password alert sent!”);
} catch (error) {
  console.log(error)
}
};
The JavaScript code will execute the three following processes that each sends different emails to the user.
The event parameter is destructured to extract the user, request, and secrets object. The user object is further destructured to extract the details of the user that triggered the Action, and the secrets object is destructured to retrieve the SMTP credentials stored for authenticating with the SMTP provider.
The createTransport method from nodemailer is used to create an SMTP Transport and the stored SMTP credentials are used to authenticate the transport.
The asynchronous sendMail method is used within a try/catch block to deliver an email containing a HTML template to the user. If an error occurs while delivering the message, it will be caught in the catch block.
To simulate a call to the new Action directly from the Auth0 dashboard, click the Play icon at the sidebar of the code editor to open the Test section.
The event object shown in the Test section below will be passed to the Action as an argument when triggered.
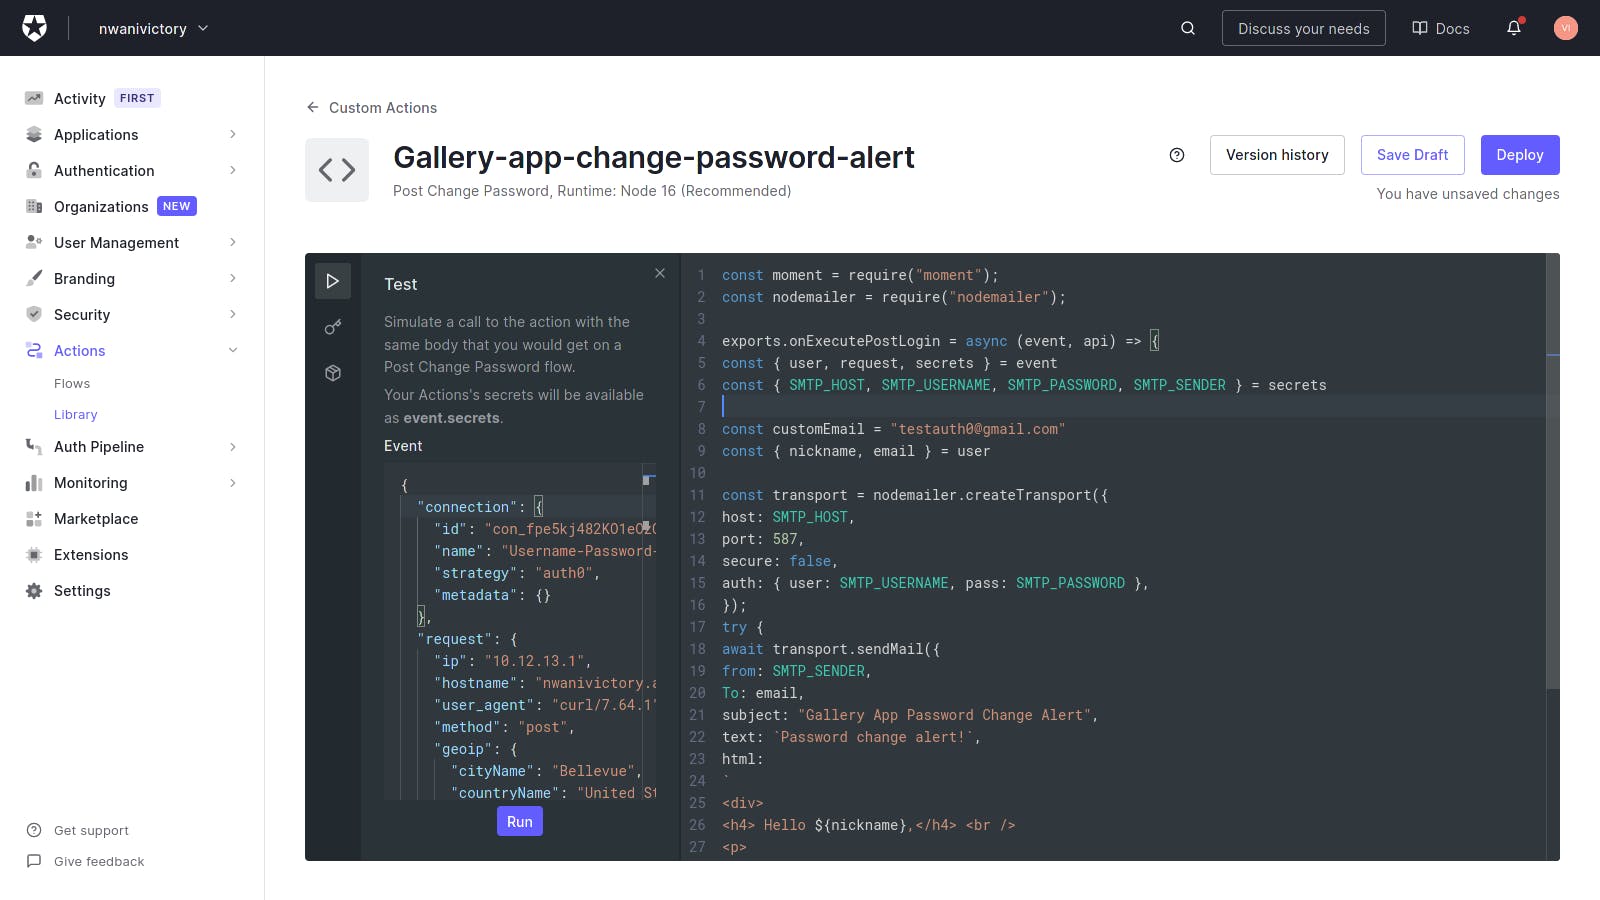
Next, click the Run button from the Test section to run the Action.
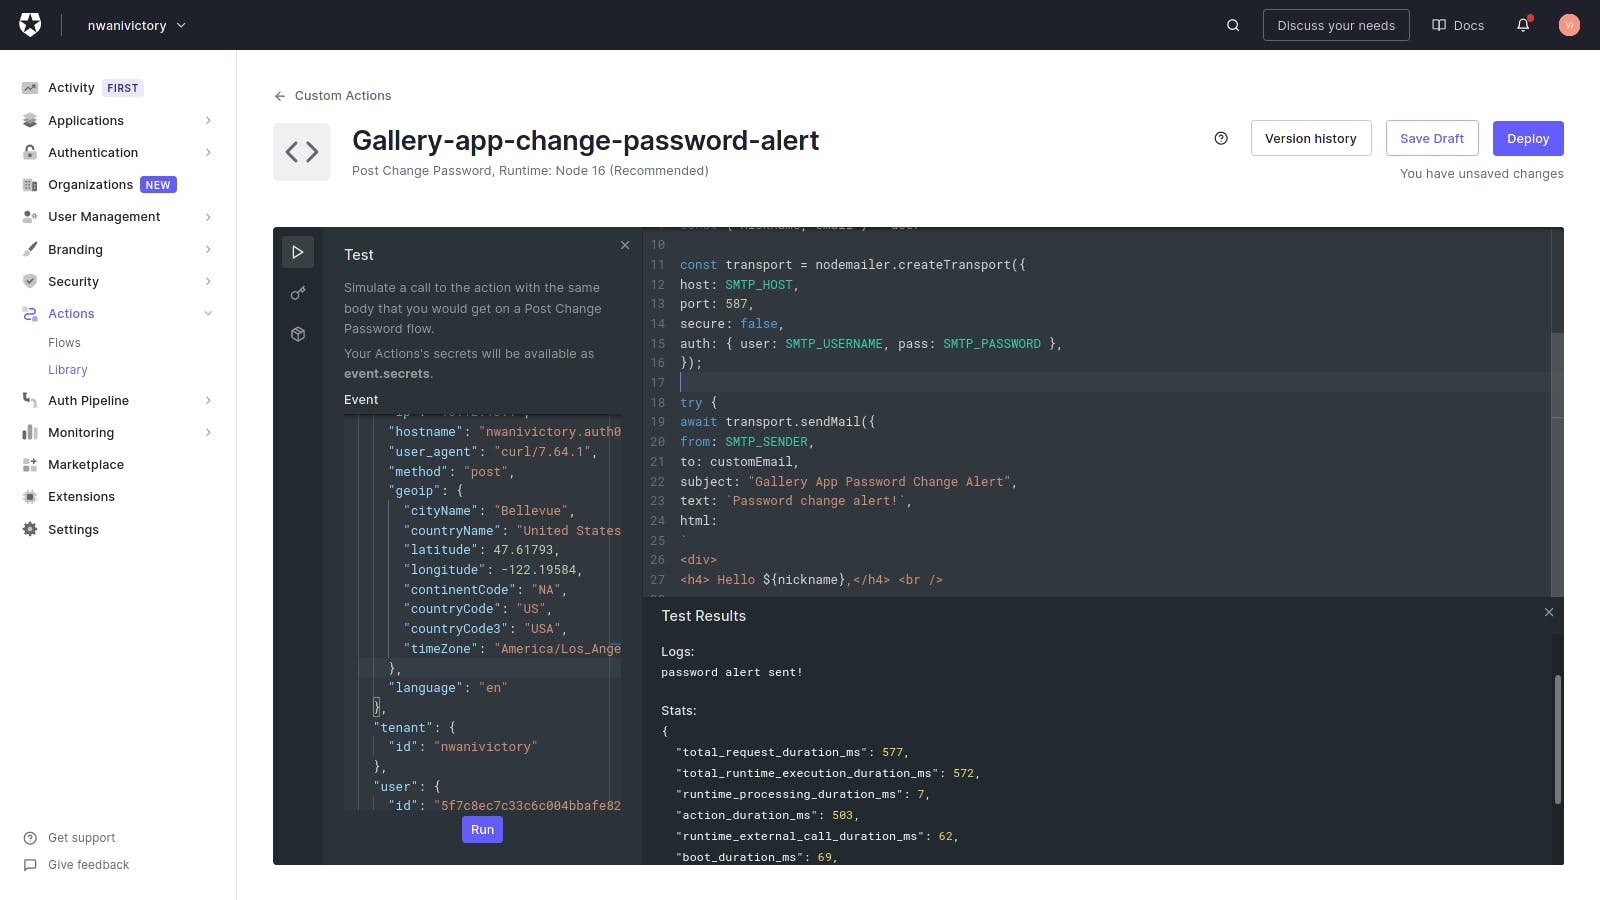
After the simulation is complete, any success or error logs returned from the execution will be printed, alongside the execution time of the Action.
The image below shows the returned execution time for the Action built within this tutorial.
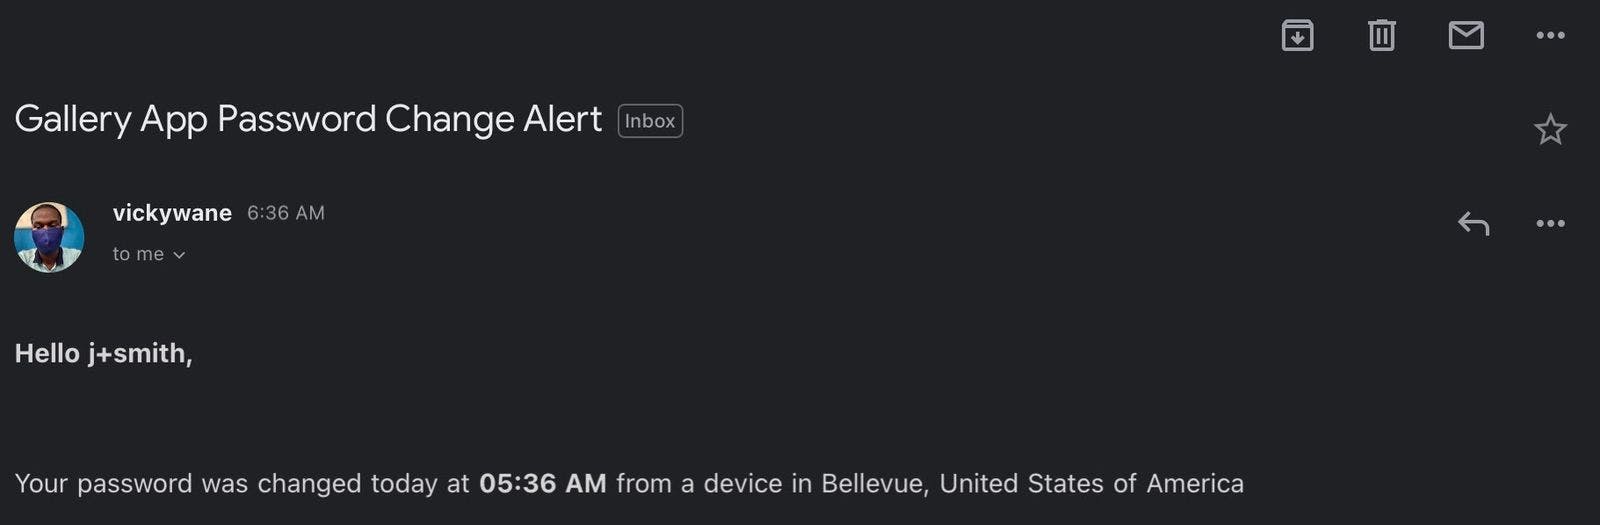
As shown in the image below, you will find the HTML email delivered to your inbox by the SMTP provider you used.
From the image below, you can see the j+smith as the receiver’s nickname, and Bellevue, United States of America as the location provided by the Action simulator.
Add A Custom Action To The Authentication Flow
At this point, you have built a custom Action that sends an email to notify a user of a changed password when triggered. You will now proceed to repeat the process of creating an authentication flow, but this time, you will use the custom Gallery-app-change-password-alert action you built.
From the sidebar in the Auth0 dashboard, click the Flows item within the expanded Actions dropdown to select a new flow to be created.
Click the Post Change Password trigger to navigate to the drag ‘n’ drop editor.
Click the Custom tab within the right placed Add Action section to select the custom Action you built.
As shown in the image below, you will have the Gallery-app-change-password-alert action listed as a custom action.
Hover your cursor over the Gallery-app-change-password-alert action and drag it into the flow editor, then drop it in the Drop Here dropzone displayed when you drag the Action.
As shown in the image below, the Gallery-app-change-password-alert action will be added into the new flow.
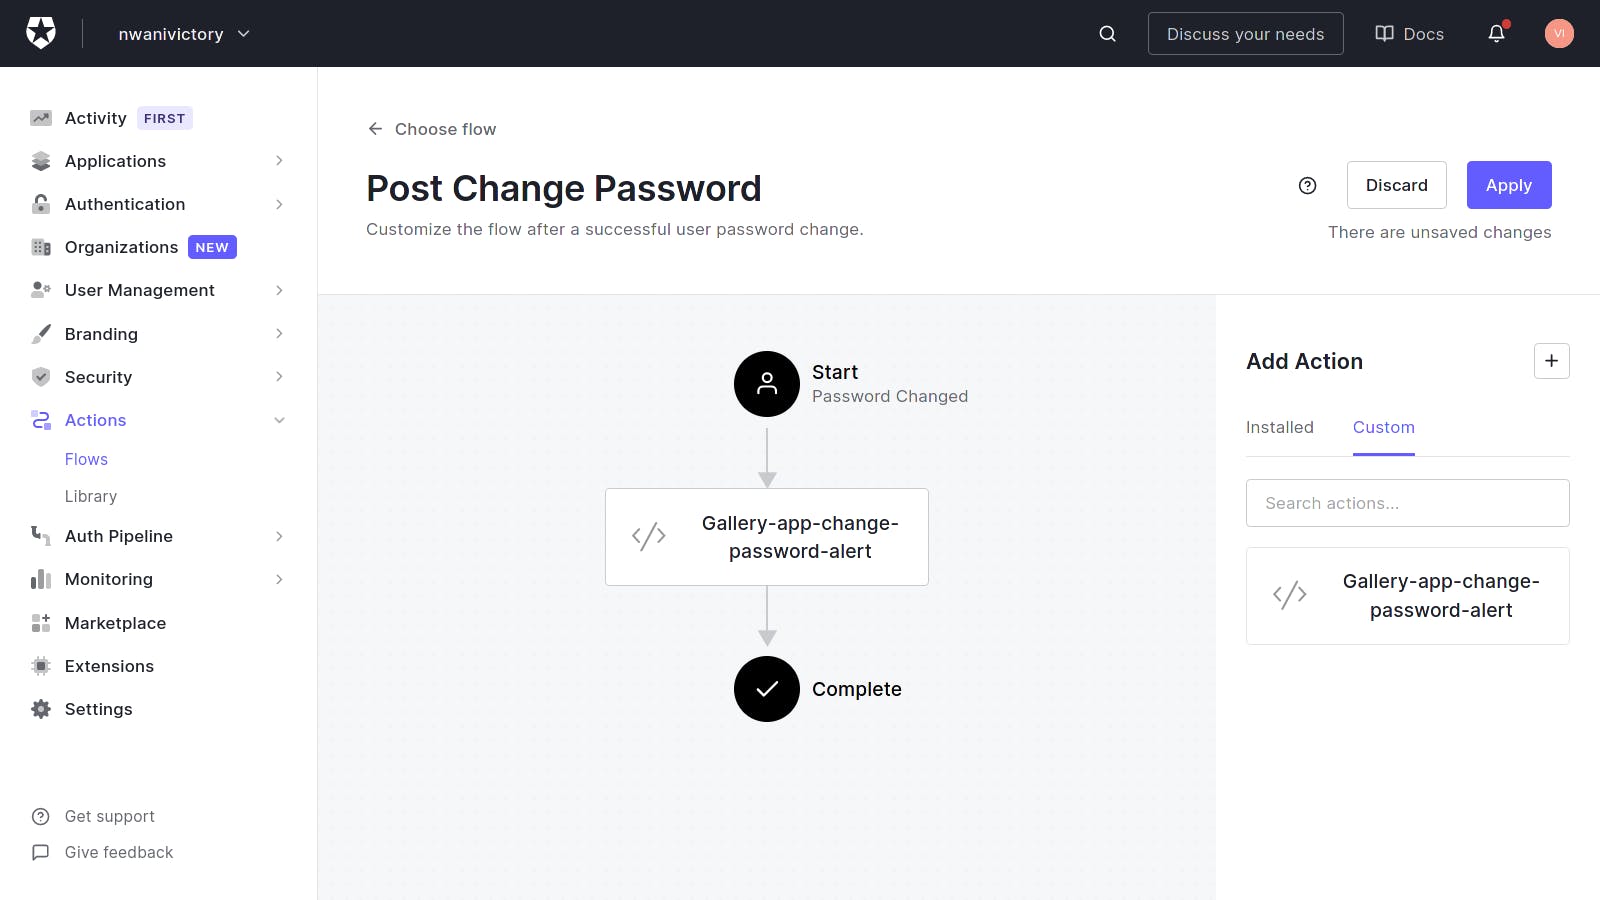
Click the right placed Apply button at the top to apply the action to the Post Change Password flow.
Conclusion
This tutorial went through the basics of Auth0 Actions. We built a custom Action that uses Nodemailer to send email alerts to a user after they change their password.
Actions are very useful when extending your Auth0 integration. Asides from the post-change password trigger, there are other triggers you can use with an Action, such as the Machine To Machine trigger for IoT applications, Post User Registration trigger for enriching a new user’s metadata, amongst others.
Enjoyed the article? At Hera, we write technical content like this for developers, programmers, software engineers, developer advocates and CTOs. Wherever you are with content marketing, we'll meet you there and collaborate to meet your goals.
Schedule a meeting, let's work together to attract, educate, and engage your audience.